Tag Archives: Food

Recipe Review: Six Sister’s Stuff: Stuffed Mexican Chicken Shells…Kind of

Standard

When I saw this recipe, I was in love.  First it was stuffed shells, which I love.  It brings back memories of helping my grandmother in the kitchen stuffing shells as a kid.  Second it was salsa and cream cheese, there is nothing more decadent than that combination.

20140121_174950Six Sister’s Stuff Stuffed Mexican Chicken Shells…Kind of

Ingredients:

4 cups chicken breast, cooked and diced
1 can black beans, rinsed and drained
6 green onions, diced
1 green pepper, diced
1 red pepper, diced
3 (8 oz.) blocks cream cheese, softened (not melted)
2 (14 oz) cans diced tomatoes with chiles, undrained (Rotel or store brand)
1/4 cup chicken broth
1 tsp cumin
1 1/2 cups sharp cheddar cheese, shredded
2 cups salsa
40 large pasta shells

Directions:
Cook pasta shells in well salted, boiling water until al dente (still have a little bite to them- if you cook them too long, they will be difficult to stuff). Drain the pasta and set aside while you make the filling.

For the filling, add diced chicken, drained black beans, green onions, diced peppers, and cumin into a  large mixing bowl. Mix well.

In a separate bowl, mix the cream cheese, chicken broth and undrained tomatoes with chiles. When thoroughly combined, pour it over the chicken mixture and mix well (if you have trouble incorporating the cream cheese and tomatoes, you can heat it slightly in the microwave).

You will need either 2 9×13″ baking pans OR one large baking sheet. Spread 3/4 cup salsa in the bottom of each 9×13″ baking pan.

Using a spoon, fill each of your cooked pasta shells with chicken mixture, setting them into the salsa-covered pan. Continue until all shells are filled and arranged in the pans.

When the pans are full, drizzle the shells with the remaining 1/2 cup of salsa (1/4 cup per pan) and then sprinkle with the shredded cheddar cheese.

Cover the baking pan tightly with foil and bake at 350 degrees for about 30 minutes or until hot and bubbly.

(I put one pan in the oven to bake for dinner and then wrapped the other uncooked pan with foil and threw it in the freezer for another night. When you are ready to eat it, pull it out of the freezer 24 hours in advance and let it thaw in the fridge. Bake at 350 degrees for 30 minutes)

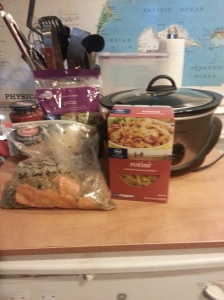
The reason I say “kind of” is that I couldn’t find any large shells for stuffing.  So in a moment of panic/brilliance…take your pick…I picked up two packages of Lasagna noodles.  I decided to make pasta roll ups.  Because of the larger pasta, I had to add 10 minutes to the cook time, I simply uncovered and cooked the extra 10 minutes and it came out wonderful.  I may take out the freezer meals 48 hours before cooking, since they are denser than stuffed shells.

I will say this particular recipe is on the pricey side, since I decided to buy a rotisserie chicken rather than cook up my own, the total came up to around $30.  That being said I was able to make a total of 30 rolls, not too bad.  With our small family of two that means five meals, and if we make a side we can have dinner and leftover lunch the following day, or five dinners and five lunches.  With a family of four, I’d say this would work for two or three dinners and possibly and maybe a few lunches.

I have to say this recipe is an absolute 10 on taste.  This just became one of my favorite recipes, I swear it was so good I would willingly stay in for this without feeling like we are missing out.  The process is time-consuming.  Between spending 20 minutes separating the chicken meat from the carcass, to having to boil up pasta in two different batches (I just don’t have a large enough pot for two boxes of lasagna noodles).  The result is one dinner this week and four in the freezer for the next few weeks.  I could reasonably make this once a month for those results.

The only change I made was in the pasta vehicle and cook time, everything else was wonderful.  I had two different flavors of salsa, one a traditional tomato salsa and the other a tomatillo based verde.  I have to say I’m loving the verde.  Seriously, this one is a keeper.

On the menu for tomorrow:

Crock Pot Red Beans and Rice…yum!
Dine In Challenge: Six Sister’s Stuff Skinny Pizza Casserole

Standard

Alright so our first Dine In Challenge Meal is from Six Sister’s Stuff blog.  I found some really great recipes, and there are a ton I still haven’t gone through, I’m thinking I hit the mother load with this site.  Here’s the full recipe:

20140120_120606Six Sister’s Stuff Skinny Pizza Casserole

Ingredients

1 Box Spiral Pasta (uncooked but rinsed)- use whole wheat noodles to be even more healthy.
1 pound lean ground turkey
1 onion, chopped
2 cloves garlic, minced
1 green bell pepper, chopped
1 cup pepperoni
1/2 can of olives
16 ounces pizza sauce or pasta sauce
1/2 cup water
1 cup shredded lowfat mozzarella cheese

Directions

Spray crock pot with non-stick spray In a medium skillet over medium-high heat, brown the ground turkey with the onion, garlic and green bell pepper. Drain excess fat. Rinse pasta and place in the crock-pot with drained ground beef mix. Stir in olives and pepperoni. Pour Pasta sauce and 1/2 cup water over noodle mix. Stir again and make sure it is mixed well. Top with shredded Mozzarella. Cover and cook on low for 4-5 hours (no peeking).  

I spend all day on Sunday doing all the prep work for about four different recipes.  Which was fairly efficient since I could pull out my food processor for all the chopping.  I found that the food processor chopped things a little fine for this recipe.  I would have liked the veg to be a little more substantial.  I also substituted the turkey for a pound of ground venison.  When it came to cooking I just had to dump the contents of my bag, a box of pasta, some pasta sauce, water and mix it up.  I found it was easier to mix it thoroughly in a mixing bowl then dump it into the crock pot.  I topped the whole thing with mozzarella and threw it on low for around 5 hours.

20140120_171537The end result was a little over done, and kind of peppery.  I think using a little more sauce would have improved the dryness.  It was definitely hardy, but not something I think I’ll put into my regular recipe rotation.  The cost was pretty reasonable, coming in at around $15.  It would feed a family of four with at least two servings left over for lunch.  At $2.50 a meal its a fairly reasonably priced for a family of four.  Improvements I would make for next time:

  • Adding another cup of tomato sauce
  • Cooking for 4 hours only
  • Larger pieces of veg
  • A different style of pasta, maybe a nice rig
  • Use a liner, I forgot to spray it with non-stick spray, and it stuck to the crock pot…a lot

On a scale of 1-10, 1 being the most retched goop I’ve ever tasted, 10 is taste bud bliss, I’d rank it as a 4, decent, but I’ve had better.

The biggest draw back of this recipe is the cook time.  At 4 hours it doesn’t really work for a work week meal.  The nicest part of this recipe, if you have kids, you can hide veggies pretty easy by food processing them.  You may even be able to add a few carrots to the mix without your kids knowing the wiser.

A little disappointed, but I have a Six Sister’s Stuff recipe for tomorrow that looks divine, so I’m thinking a redemption is in order tomorrow.

On the menu tomorrow:

Six Sister’s Stuff Mexican Chicken Shells…sort of…

Freezer Cooking Update

Standard

It’s Sunday again and I’m getting ready for this week.  So I thought I would update you on my results with freezer cooking.  Last week was a great cooking week, with only a few small problems.  So I was able to make chili cheese quesodillas in 10 minutes, just a little longer than it takes to nuke a tv dinner, and they were so good!!!  I was really pleased with how easy it was to just pull out a few items and get dinner done in a flash.  I did wind up getting take out once, which worked out well because my husband used the ground meat for pasta sauce.  The other problem I was we ran out of a few items, and Steve had to go to the store on Tuesday to pick up some more cheese.  All in all it worked for my household, but I did learn a few key things this week…

Always tell who ever you share the kitchen with the plan.  Make sure he or she is actually paying attention.  We had a bit of a screw up that was my fault.  I tried to tell Steve about the freezer cooking plan when he was otherwise occupied.  So he really didn’t get what I was telling him.  I pulled out a pound of browned meat last week with the intention of using it that night.  Well, he decided to make some pasta sauce with it, and didn’t remember that I’d made several servings of pasta sauce and they were sitting in the freezer.  Ops.  Oh well, it worked out alright.

This weeks plan is kind of similar, except instead of making chili, which I still have a few meals in the freezer, I’m making shredded BBQ chicken.  This morning I threw about 6-8 frozen boneless breasts in the crock pot with a bottle of BBQ sauce, turned it on high and hopefully by this evening I can shred it, pop it into bags and freeze part of it.  I’m also going to brown a few more pounds of ground meat and make a few more pasta sauces…I’ve got an open container in the fridge from Steve, and I don’t want it to go to waste.  I also am going to try a new recipe this week for peanut chicken and noodles that I think my shredded chicken will be tasty in.

Yummy…

Freezer Cooking for the Real World

Standard

Okay, so cruising through Pinterest I noticed a lot of pins for Freezer Cooking.  The idea is that you cook a ton of food once a month and then you just throw it all in the freezer.  Then for the rest of the month you can just pull out a meal, reheat and eat.  While I love this idea, you have to be highly organized, ready to cook your brains out for one to two days, and be ready to fork over a few hundred dollars for essentially a months worth of food.  I am none of those things…

I love the idea of having ready to eat food that you can just throw in the oven, or on the stove without a lot of fuss.  I just don’t have the time or energy to spend two days on cooking, and we don’t eat a lot of casseroles or crock pot meals.  So here’s what I did to maximize the idea of freezer cooking, that works with our cooking style.

I wrote down directions in the note section so if Steve is cooking, he can figure out what freezer things he'll need for that meal.

I wrote down directions in the note section, so if Steve is cooking, he can figure out what freezer things he’ll need for that meal.

I did my weekly meal planning, just like I would any other week.   Here’s the run down for this week:

Sunday Chili

Monday Chili Quesadillas (I love these, just add a few table spoons of Chili into a quesadilla, they are fantastic)

Tuesday Hamburger Helper

Wednesday  Chili Quesadillas

Thursday Pasta

Friday Venison Steaks

Saturday Out/Leftovers

Then I looked at what I needed to do to actually prepare for these meals.  My biggest prep day is for Chili, which I made on Sunday.  I also knew that for the pasta, I usually add bell peppers and onion and a pound of ground meat to what ever jar of sauce we have.  I had a jar of pasta sauce in the fridge, so why not make up the sauce now?  Hamburger helper also takes a pound of ground meat browned.  All of these things could be done ahead of time, frozen and easily reheated.

So I went to work, defrosting frozen meat, chopping the veggies I need, browning ground venison.  The end result of a little over an hour:

A whole crock pot of chili (4-6 meals depending on how it is used)

Two pounds of ground venison, browned and ready to be added to anything (2 meals)

Two perfectly portioned pasta sauces (2 meals)

So now I have a surplus of between 3 and 4 meals.  If I do this again next week, I now have 8 meals and so on.  Plus, most of the prep work is done, which makes me much more likely to cook.  Since I cleaned and packaged things as I cooked I only had about ten minutes of clean up.  I just labeled everything with what it was, when it was made and when it needed to be eaten by (3 months).  I wrote it all down on a post-it and taped to the container.  Let everything cool down to room temperature and throw it in the freezer.

What would giving up an extra hour of prep work on the weekend give you?  If you save even 10 minutes of work during each week day, what would that mean for your family?  An extra bedtime story for your kids?  Playing fetch with Fido?  Cuddling up on the couch with your Honey?  Organizing a drawer, cupboard or desk?  This all sounded good to me too…

Cheap and Easy Dog Treats

Standard
Here's Steve helping me make some dog treats.  Thank you Honey.

Here’s Steve helping me make some dog treats. Thank you Honey.

So I like to bake, I don’t always get a lot of time to do this.  I don’t really need the extra calories either.  So for Christmas I made dog biscuits to give away to people we know with dogs.  This is probably one of the simplest recipes I’ve found online.

Sweet Potato Dog biscuits

2 1/2 Cup Whole Wheat Flour

1 Sweet Potato

1/4 Cup Unsweetened Applesauce

2 Eggs

Directions:

Pre-heat the oven to 350 degrees.  Prick the Sweet Potato with a fork and microwave it on high for 6-10 minutes, or until tender.  Scrap out the cooked sweet potato and dispose of skin.  In a bowl combine 1 cup of cooked sweet potato, and the remaining ingredients.  Mix well.  Flour your counter and roll the dough out until it is a 1/4 inch thick.  Use cookie cutters or simply cut dough into bite size pieces.  Place on a greased backing sheet, and cook for 15-25 minutes, or until browned and hardened to biscuit consistency.

I know you’re looking at the baking time and thinking WTF…the baking time depends on how large you make the biscuits.  I usually do small inch long bones and they only take about 15 minutes.  However, I made some big ones I made took 25 minutes.  They do puff up a little bit

So far most of the dogs have loved these biscuits.  They are very cheap to make, and are healthier than most doggie treats.  Now this doesn’t mean you can feel Fido a ton of treats, but every now and then isn’t bad for them.  They don’t have preservatives in them, so don’t expect them to last for ever.

Here’s the link to the original recipe, the only change is the timing:

http://allrecipes.com/recipe/super-simple-sweet-potato-dog-treats/detail.aspx?event8=1&prop24=SR_Title&e11=sweet%20potatoe%20dog%20biscuit&e8=Quick%20Search&event10=1&e7=Home%20Page

P.S. If you haven’t checked out allrecipes.com, you need to get into gear.  This is one of the best recipe databases I’ve encountered.  There’s no need to buy another cookbook, you can probably find a great recipe online.

Get ‘ere Done: DIY Pantry Organization

Standard

So this is my new years resolution, to get one DIY project done every weekend.  The rules are that the project needs to be completed in one day, and I’m hoping that I can cap the cost at $100 or less.

So last night, while everyone else was out partying down, I was at home trying to put together ikea furniture.  I love Ikea, I hate Ikea directions, they basically suck.  If you haven’t had the pleasure of putting anything Ikea together, think ready to assemble directions with no words.  It’s a thing of beauty.

Here’s the skinny on the DIY Pantry:

Cost: $230 (I know way over the budget, but this is my first go)

Difficulty:  EASY (If you can follow crappy directions, you can do this.)

My Future Pantry

Welcome to one of my dumping grounds…lovely isn’t it.

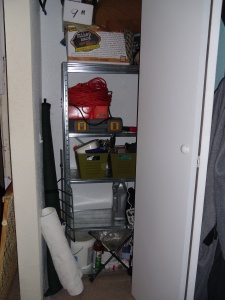
Here’s the Before:Okay It’s bad, I know.  This had become one of our most nefarious dumping grounds.  Ever since we moved in we’ve been trying to figure this space out, and basically it has become a wasteland of crap we didn’t know what to do with.  So let me give you the basic tour.  This area started off as a pantry, with a super cheap galvanized steel book shelves.  As we painted and fixed up other places in the house, it became home to various tools, paint and other scraps of junk.  Finally it just got so messy we just started throwing whatever into the cesspool, and have ignored this space entirely.

In our little house all space is valuable real estate.  Especially anything connected to the kitchen.  I have the worlds dumbest kitchen.  I know other people hate their kitchens, I loath mine.  Who ever designed this kitchen was a moron.  The worst part is without some major renovations, I’m stuck with it.  We have literally one wall of usable space in the kitchen, 96 inches that houses the stove, a few cabinets, and the sink.  I can’t use any of the other walls to add more cabinets, because of door openings, a huge picture window that looks out at 12 foot retaining wall (lovely view right) and baseboard heaters.  I do have a nitch that houses the refrigerator on the other side, but storage in my kitchen is crappy.  This area is right next to the kitchen.  Valuable real estate, housing mostly garbage.

Getting ‘ere Done:

So I measured the space and started researching.  Now I could have purchased a cheaper unit, I chose the Ikea OMAR unit because of the accessories.  They have these cool pull out drawers that I though would be great for snacks and side dish packets.  So I shoveled out the space, however I knew most of the stuff in there were things we wanted to keep.  Paints, tools, camping gear.  So I had to find another place to put them in.

Here’s my organization tip on this one.  Evaluate your real estate.  High value real estate are the shelves at eye level or a little above or below, that you don’t have to move a bunch of crap to get to.  This is where you put things you use everyday, or very often.  Things that are higher or lower but still easy to reach are mid value real estate.  These are things you use often, but probably not every day.  Low value real estate are things that are hard to get to.  These are things you only use once or twice a year.  Think the roasting pan you only pull out during the holidays.  So this will be different for everyone.  For us the least used item is my husband’s fryer.  Now I’d love to get rid of it, considering it’s been several years since we’ve used it.  However, it’s my husband’s toy, and I can’t make the call to get rid of it.  So that goes on the top in the corner.  I’d have put it on the bottom, but it is too tall to fit on the shelf.   On the bottom are things like cookie sheets, toilet paper, and appliances I don’t use very often.  In the high value area is the food we tend to use often.

So I thought this would be an easy one day project.  I’m still cleaning up from this one, two days later.  I love it though.  I’ve been wanting to stock up on some canned staples and dry goods for every, but without the space we were stuck.

Complete change, huh?

Complete change, huh?

I love these drawers.  We put snacks in one, side dishes in another, and spice packets in the last one.

I love these drawers. We put snacks in one, side dishes in another, and spice packets in the last one.

So here’s the two for one deal.  All the DIY stuff, tools, paints and what not, went downstairs in an extra closet.

Okay so it's not perfect, but everything is loosly organized.

Okay so it’s not perfect, but everything is loosely organized.

DIY Christmas Gifts, this is it…

Standard

Well I was going to try to do a 12 days of DIY Christmas gifts…life happened.  What ever…

So I’ve talked about bath and soap stuff, making candles and baking.  All great options.  So this is the multitude of other things I’ve done.

Sew Good…

A few years ago I got it together before the holidays, and I was able to do some embroidery before the big day.  Something that doesn’t really happen all that often.  I got some flour sack towels, a few embroidery transfers and some floss and went to town.  I was able to make a few towels for each family.  The neat thing was I was able to get patterns and colors that matched each person’s decor or taste.  These came out great, and I’d totally do them again.  The only issue is the time they take.  I could do about one a night after work, so if you want to make a bunch of them be ready for a long haul.

I got the idea from the ones my grandmother made for my parents.  I’d always loved them growing up, they are just a cool vintage touch to tell someone you care.

Jar Recipes, mixes, etc…

I’ve had various degrees of success with making food mixes.  I made some chili jars, only to find out later from my parents that the directions sucked, and it took a huge pot to make it in.  So here’s the skinny on jar recipes.  Before you pick your recipe, choose something you think people will use.  The last thing you want to do is spend cash on something that will sit around in a cupboard until the giftie finally decides to pitch it.  Cookies are always a good bet.  The directions are easy to follow, and require things that most people have in stock.  Plus flour and sugar are dirt cheap.  Now nuts and candies are a bit on the expensive side, but these are usually extras or optional things, and you can substitute more expensive nuts and candies for cheaper options.  Plus if you’ve got a special cookie recipe, you can put the dry ingredients into a jar.  Other mixes that have worked well in the past are things like hot chocolate.  Who doesn’t love hot chocolate…well I know there’s a few people out there, but most people generally like it.

Here’s the major pit fall in making a ton of mixes and jars.  Figuring out how much you need if you’re converting cups ounces and grams.  The year I made hot chocolate I was crazy off on the conversion.  Going to the store in the dead of night, trying to convert cups to ounces was not the best idea.  I should have just gone to bed.  I spaced that ounces are measurements of weight and volume.  So I was thinking I needed a bunch of cups of powdered milk, and I got an enormous box.  I only used about half and had powdered milk hanging around the house for a few years.

I’m sure I’ve made other cool presents I’ve forgotten about, but right now I’m tired and can’t remember.  Tomorrow is the first start of my break.  Finally.  I totally need some time to recharge my batteries, and get a few projects done around the house.  Soon I hope to have the coolest idea for a window treatment, ever up.  I’ll let you know when I get it done.

If I don’t get to say it later…

Have a happy Christmas, Hanukkah, Kwanzaa, Solstice, Festivus or what ever you are celebrating!