So when we bought our house it didn’t have a backsplash, and it’s always something we’ve been meaning to get to. Well, I got sick of it finally and decided to do something about it. I love the look of old tin tiles, but they are a little expensive. I was thinking of doing the PVC versions, but I didn’t have the cash on hand to go that direction. I came up with a different solution. I had some paintable wallpaper that had a square pattern that reminded me of old tin tiles, I got some paint, and voila…new backsplash. While this didn’t work out as great as I’d envisioned. It looks much better then the torn up wall for now.

Here’s the before picture. Pretty blah.
Here’s the deal with this DIY Backsplash:
Cost: About $40.00 (we had all the basic tools we needed, if you don’t, it will get more expensive)
Difficulty: Medium (if you can hang wallpaper like a pro this will be easy, I suck at it)
Time: about 24 hours or so (it’s taken a little while longer to dry)
Here’s what you need to DIY this one on your own.
Roll of paintable wallpaper (if you get the pre-pasted kind you don’t need past, if not plan on buying that as well)
Paintable Caulk (I got some that dried in 2 hours)

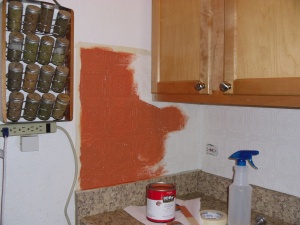
The wall was pretty banged up.
Paint of your choice. If you want it to look metallic like mine, you’ll need a base coat color and metallic glaze. You’ll also need polyurethane for the top coat. The other paint is acrylic and will wash off if you scrub it to hard, the polyurethane protects the paint job.
And you’ll also need basic painting supplies, brushes, rollers, a sponge, utility blade the usual stuff for a wallpaper/paint job. I used a disposable foam brush for the polyurethane rather than have to deal with mineral spirits.
The original counter top was pretty ugly tile that went halfway up the wall. When we replaced the counter it damaged the wall. While I love the new counter top, I don’t care for the damage to the wall.
The first trick to doing a DIY project is prepping the space. This means clearing everything out of the work space, and finding all the tools you need. I assembled all the tools in a single area to keep things simple. The wall had some embedded grease that I couldn’t get off. So I used some Kilz primer and painted the wall, just to prep
Here’s the base coat of interior paint.
the space. The paper was pre-pasted so I measured and cut what I needed then filled up the bathtub. A quick soak and then I bookended it (you flip the two end, paste side to paste side into the middle and let it sit for 5-10 minutes. I don’t know why you do this, I think it has something to do with the paste reconstituting). Then Steve and I started papering away. Don’t forget to wet the surface, it helps. This part was the biggest pain in the ass, ever. It kept sliding around, falling off, it was like a circus. Finally we got it fitted into place, cut and stuck to the wall. Or so I thought…
We left the paper to dry over night. At about 6 this morning my husband came in the bedroom yelling, “if you want to save what’s left of that paper you better get up and fix it.” He went to work, I went to Wal-Mart. The adhesive wasn’t sticking and it was bubbling up in areas. I read somewhere that someone used caulk to seal the seems, and decided to try some caulk to glue it down. Actually it worked pretty well. There were still some bubbling, but it wasn’t too bad. So I started painting.

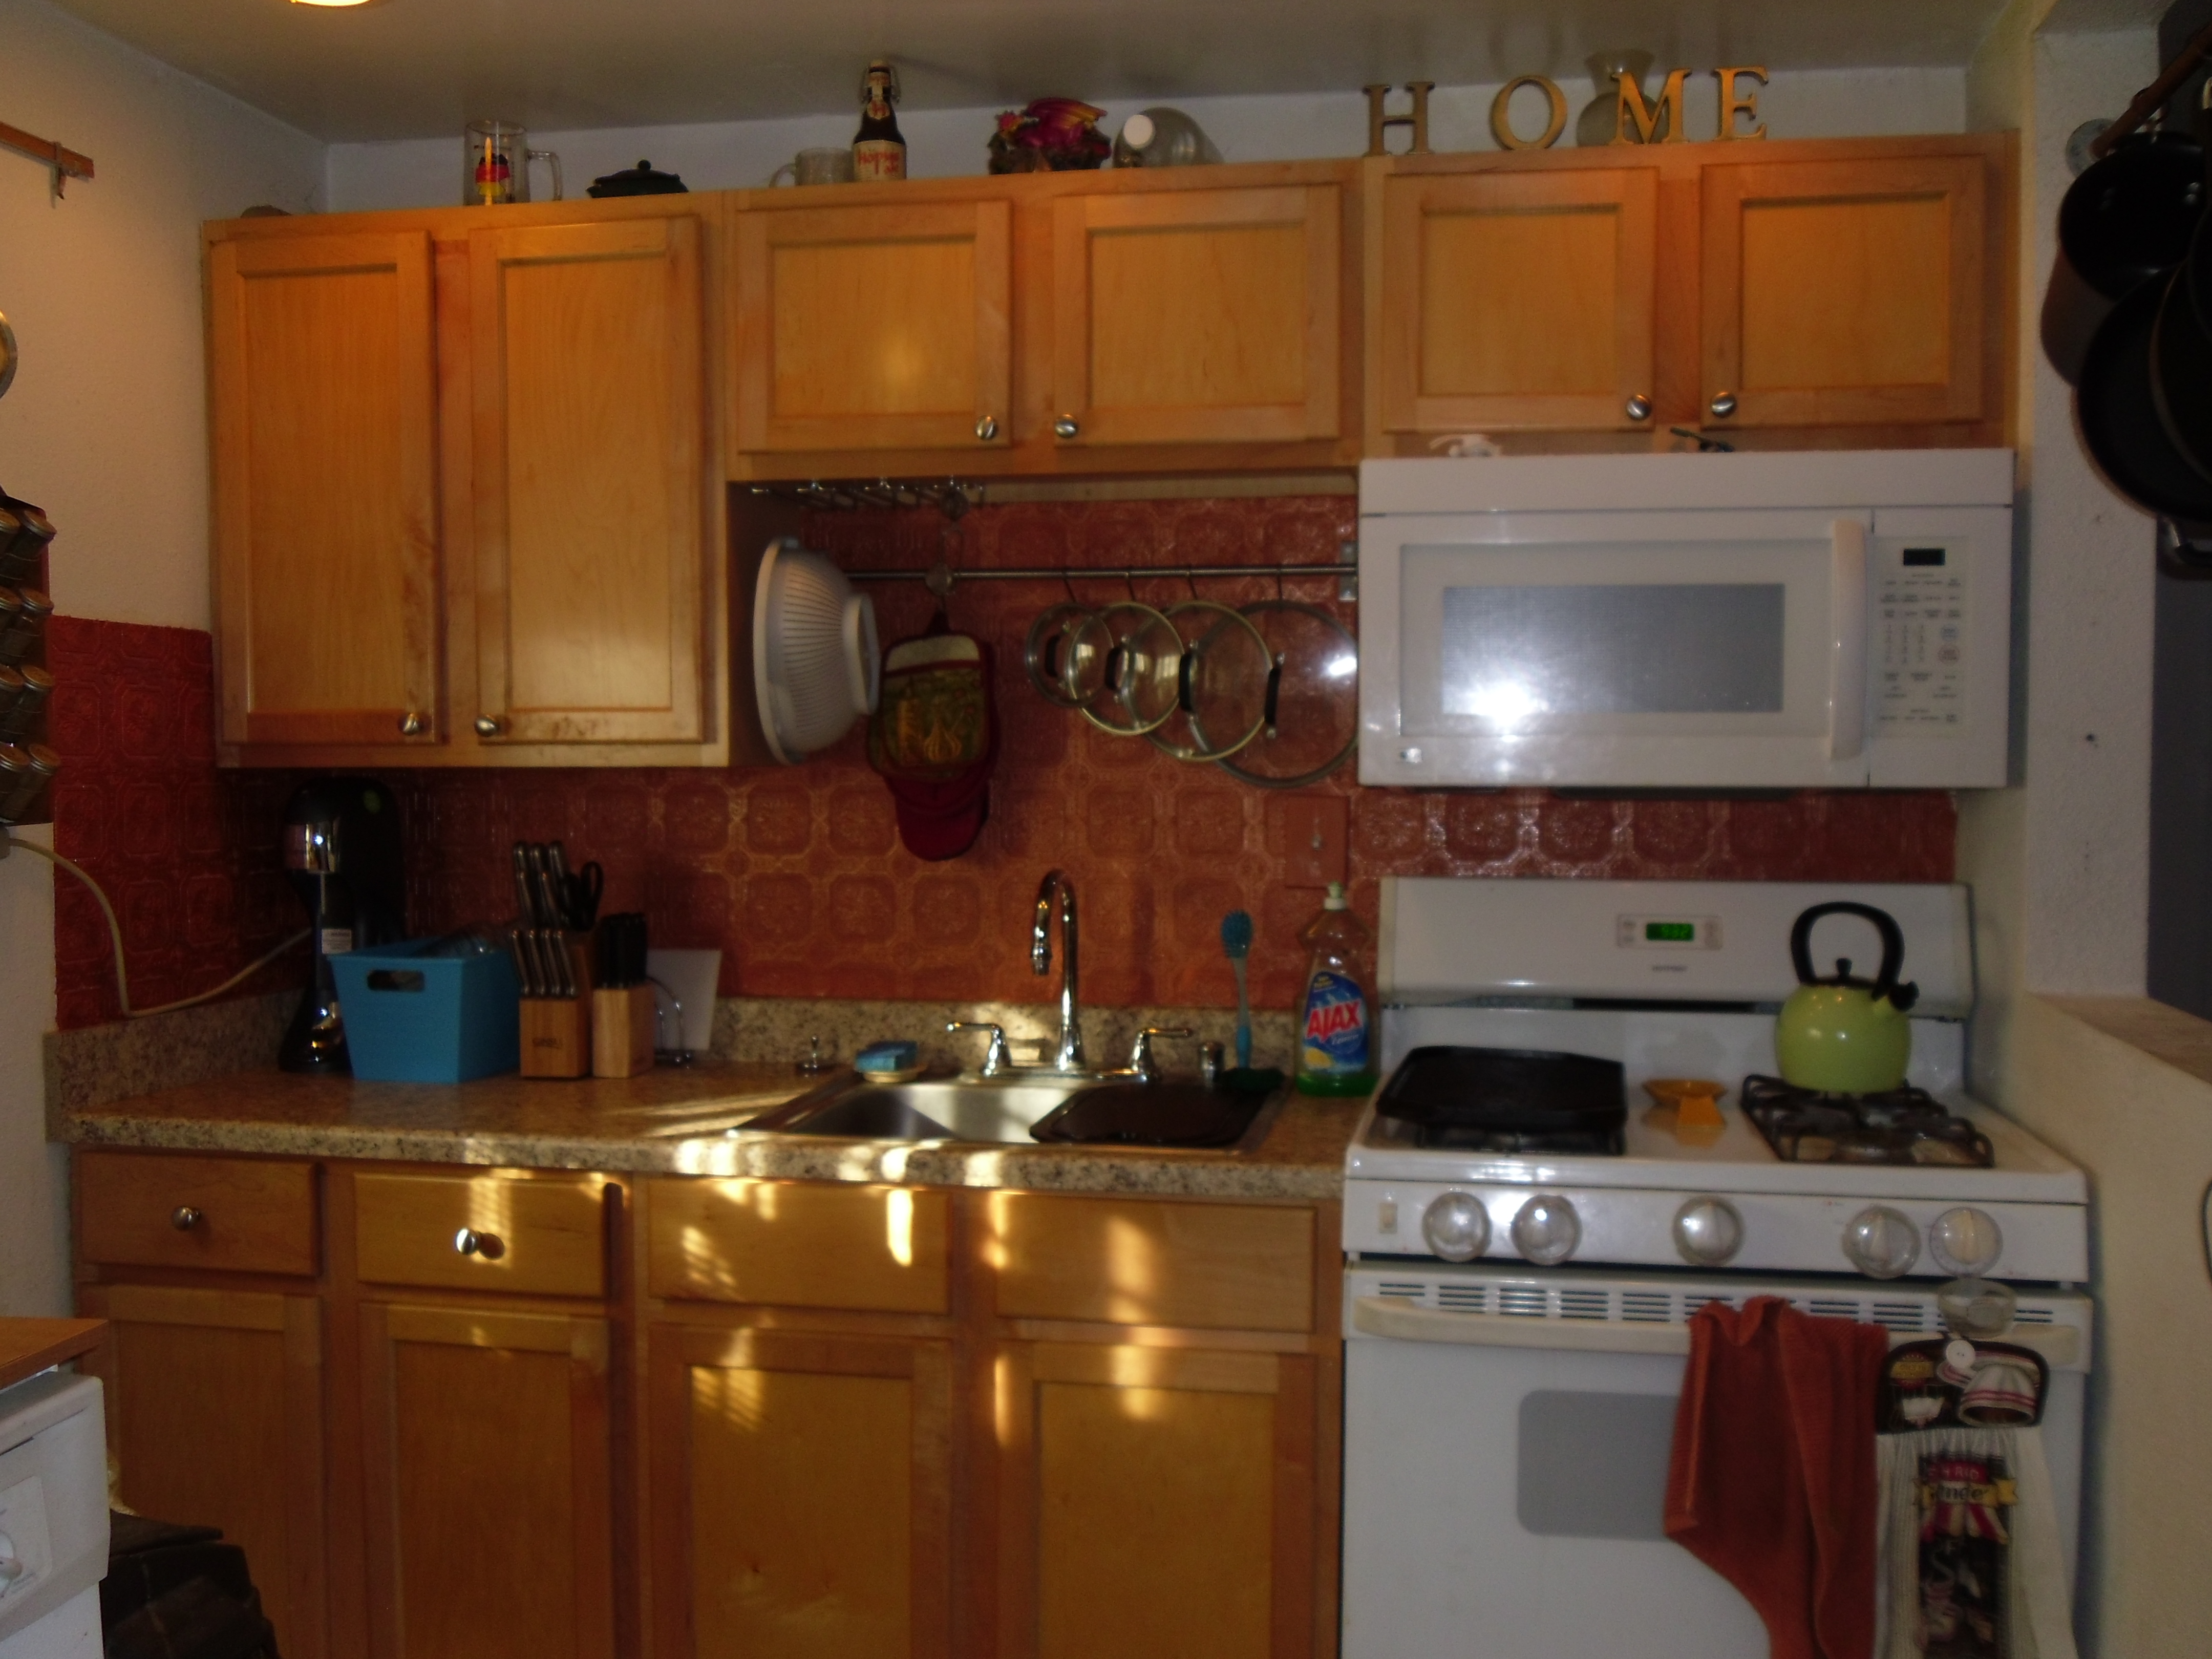
I know the picture doesn’t do it justice. It looks just like copper.
Never trust the Home Depot guy when he tells you need a ton more paint than you think. I got talked into buying four times as much paint as I needed. I was just going to get a little sample jar, that’s about 8 oz. And he talked me into a pint. Then I was talking to him about the glaze and he told me I needed at least four jars. I bought two just in case, and I only used about half a jar. I used Martha Stewart brand glaze in copper penny. Glaze is transparent so I literally took the jar of glaze and matched it to regular none metallic interior paint.
One base coat, one coat of the glaze and one coat of polyurethane. The effect is incredible.
The final product looks pretty good, in spite of some issues. I think I might add some molding around the edges, but it looks beautiful. The paint actually tightened up some of the loose spots. So it looks a lot better than I thought it would half way through. We also got an Ikea Grundtal bar and hooks for about $13.00 that’s not added into the project cost. It was sort of an after thought. We just happened to go to Ikea and looked around at all the cool toys there. It works great for hanging the lids of our pots, and pot-holders. Before I just had a few cuphooks above the sink for some of that stuff. Well, I think I’m almost done fussing with the kitchen in this house. I’d like to install the dishwasher, fix the top of the half wall, and maybe do some art projects on another wall, but that’s it. It feels so much cozier in there with some color behind the cabinets. Hope you enjoyed this episode of Get ‘ere Done, come on back next week to see what else I will try to rip apart in my house…